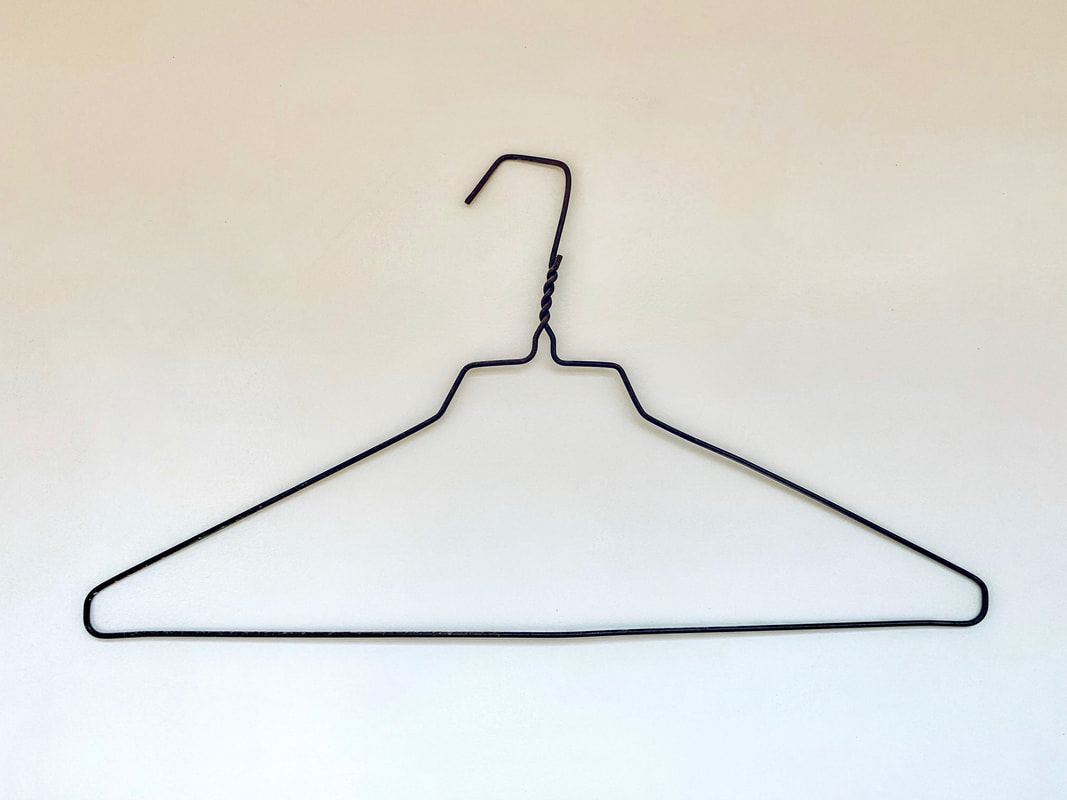
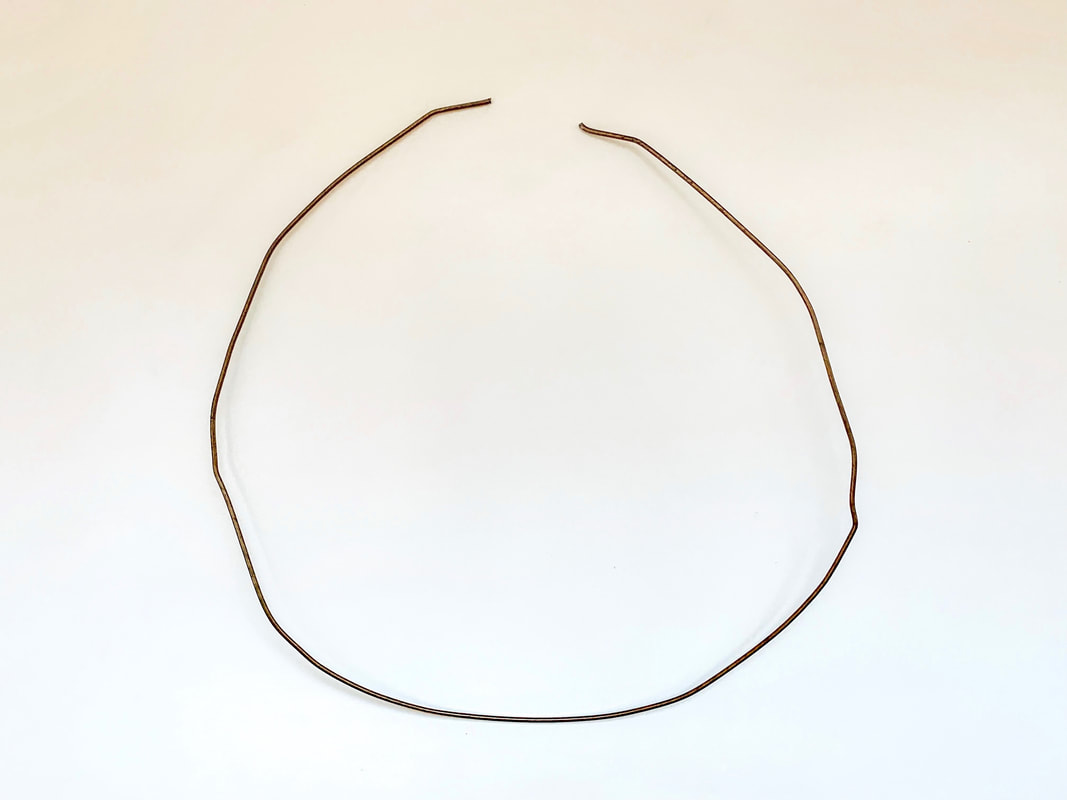
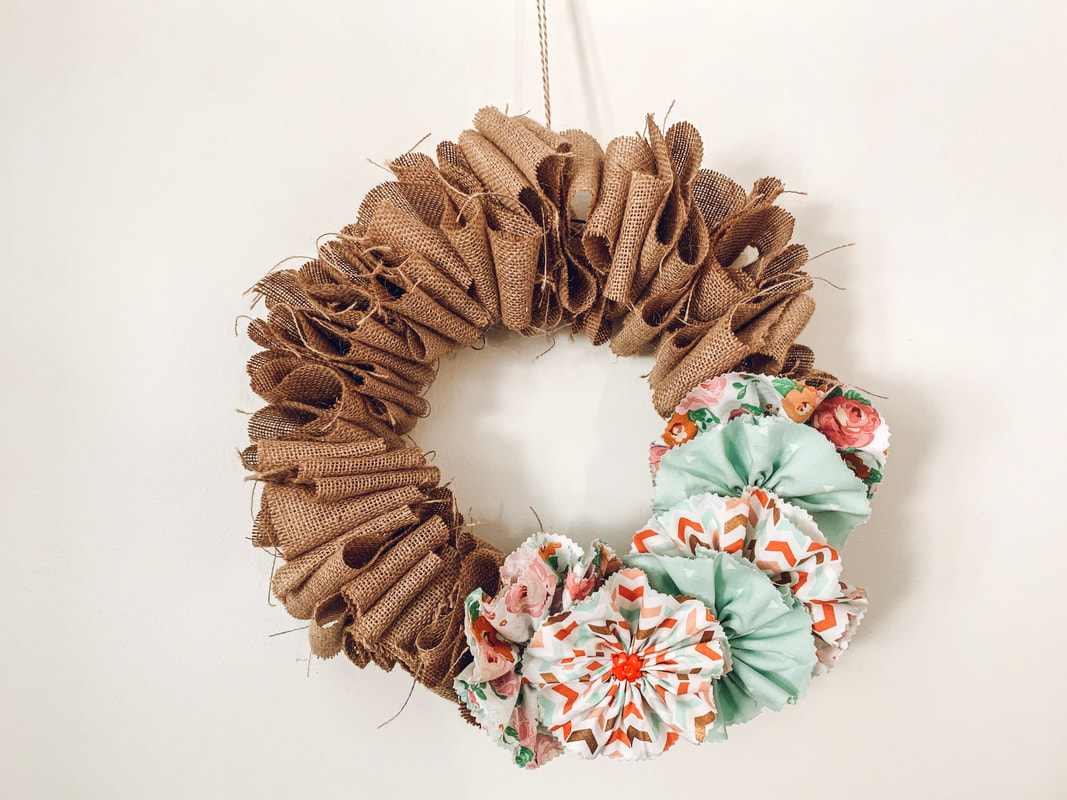
 For this project you’ll need:
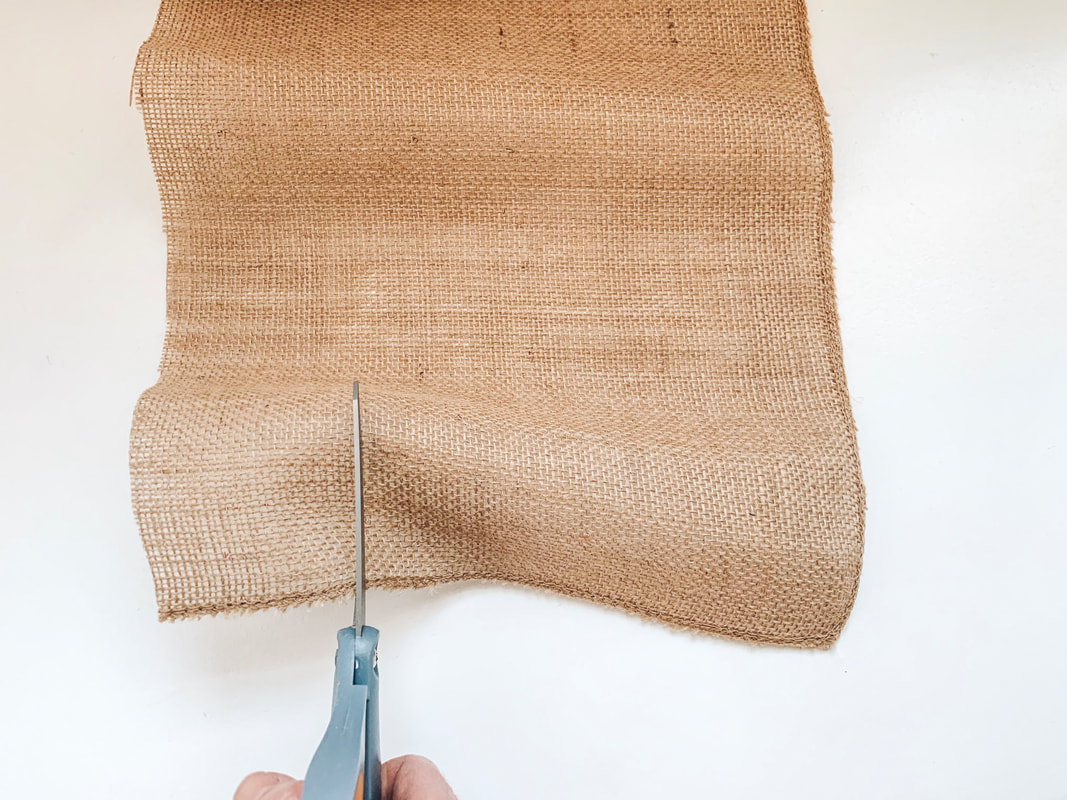
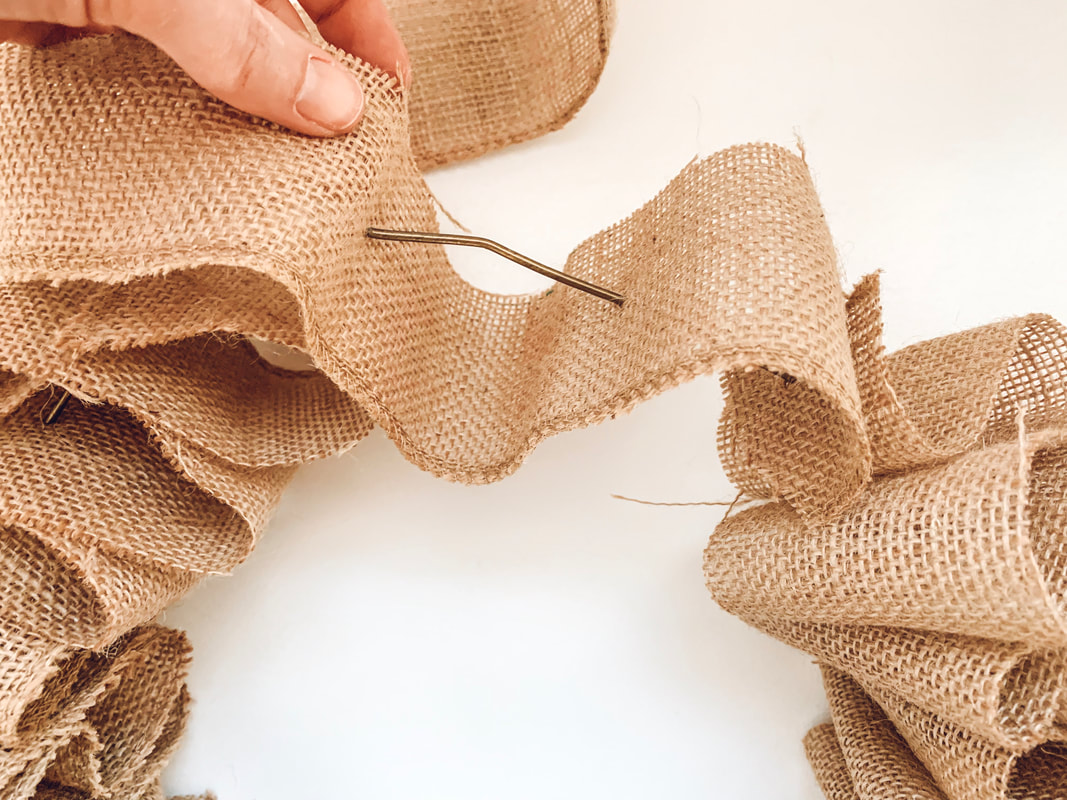
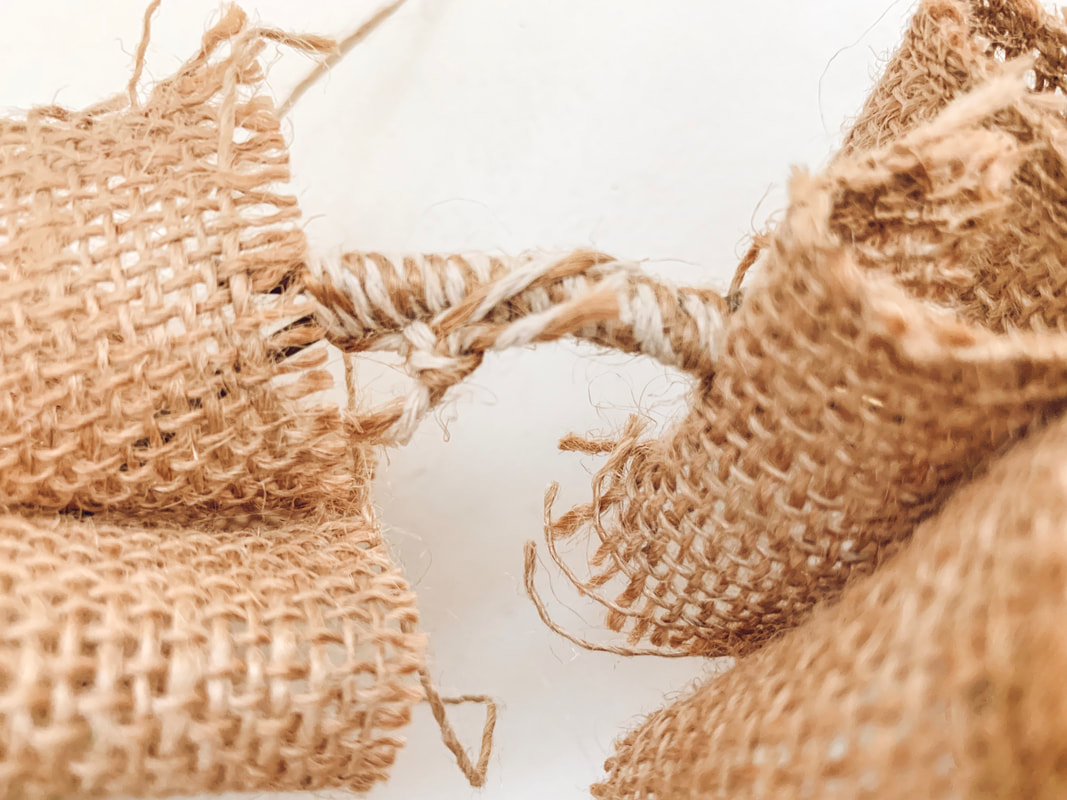
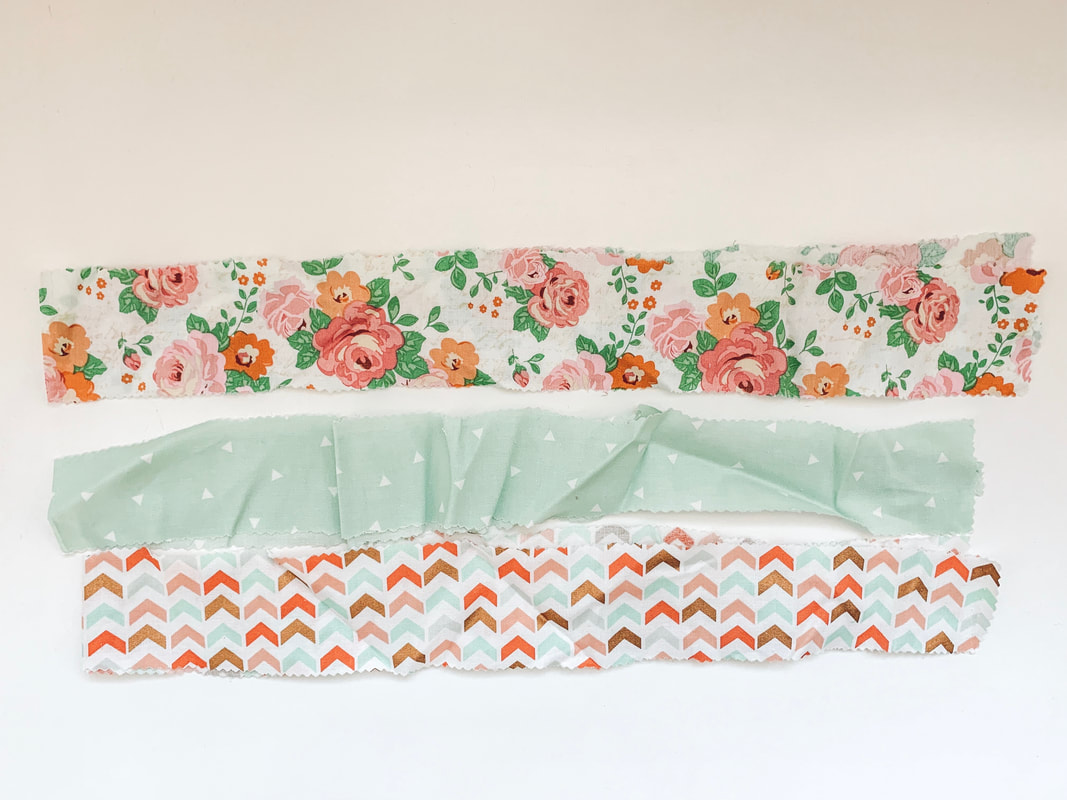
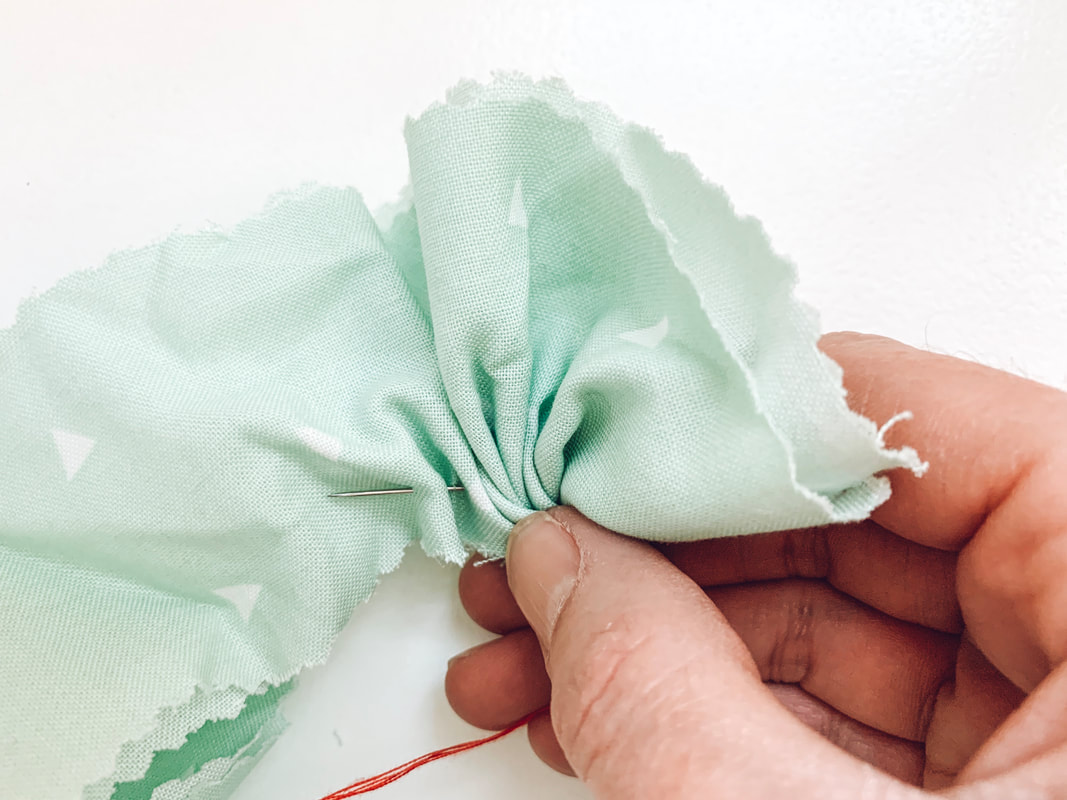
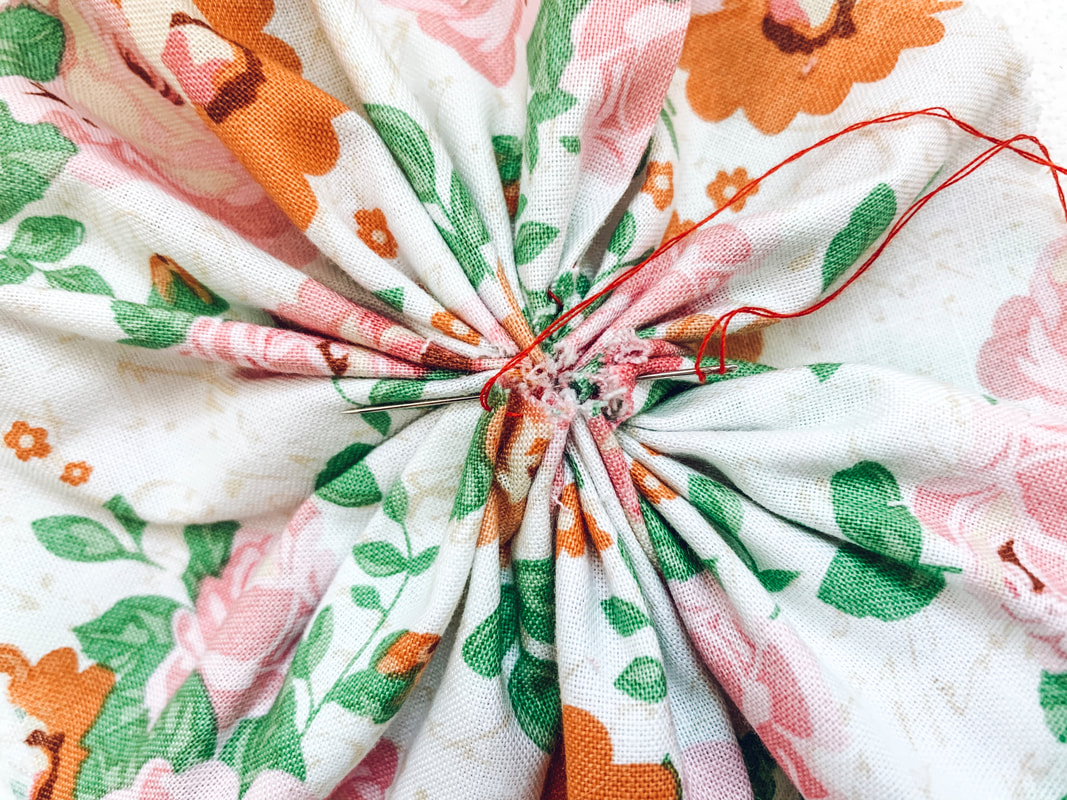
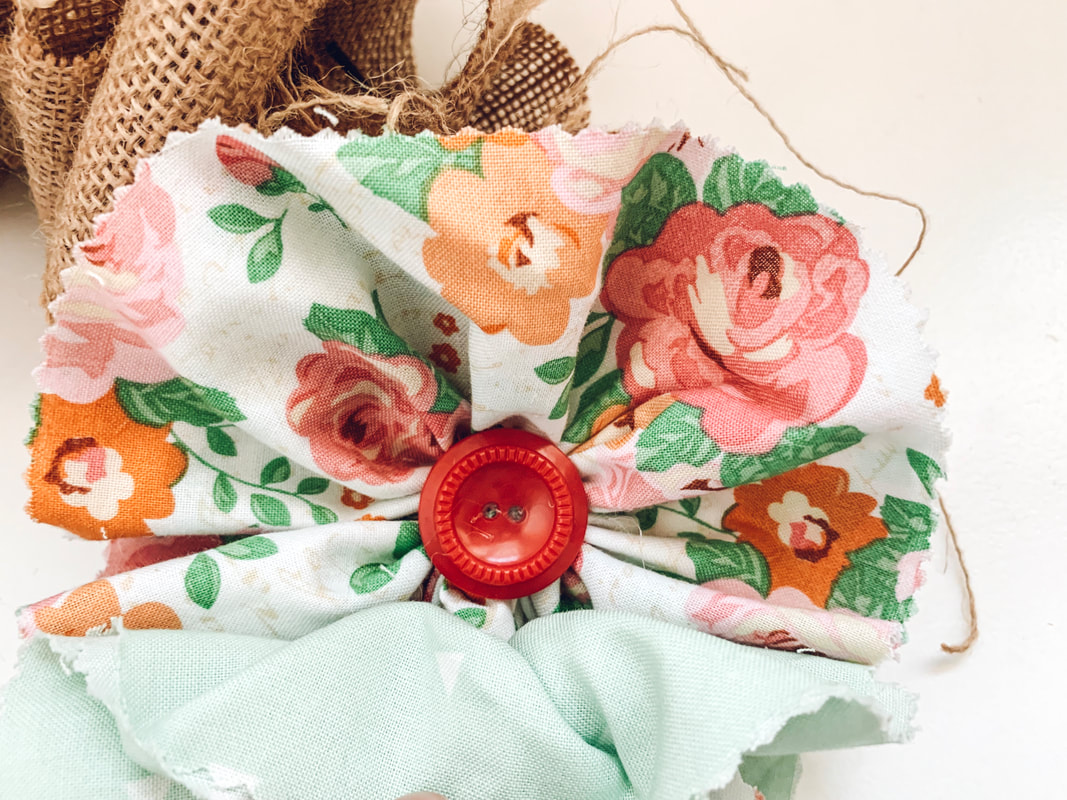
2. I didn’t have burlap ribbon, but I did have an old table runner from Target. It originally cost around $5 found and I found it in the party aisle. I used my scissors to cut the table runner into long sections a few inches wide. 3. Once I had my burlap ribbon, I simply thread the burlap by poking it through the wire hanger leaving a few inches for a pouf, more fabric between each thread equals a pouffier wreath. 4. When all the burlap ribbon has been threaded onto the wire hanger, either twist the hanger back together to close or clasp it together with twine. 5. Next I found 3 different coordinating patterns of fabric scraps. I cut long strips of fabric using pinking shears (you can use regular or fabric scissors if you don’t have them) a few inches wide by about 40 inches long. Then take your fabric and fold it long ways, so the front of the material is on both sides. 6. Next take your threaded needle and gather your fabric like an accordion, pleating each ‘flower petal’ until you’ve reached the end of the fabric. Create the flower by circling the end back to the beginning, stitching a few threads to the create the final flower. 7. Criss cross a few stitches in the back of the flower to hold its shape. Repeat until you’ve created all of your flowers. I created six for this wreath. 8. Hot glue your flowers onto the front of your wire hanger. Bunching all the burlap to make it look fuller and leaving the open wire to attach your flower embellishments. 9. Finally hot glue buttons onto the front center of each flower to hide the thread. This article was featured on Adore Them. To view the entire article click below.
0 Comments
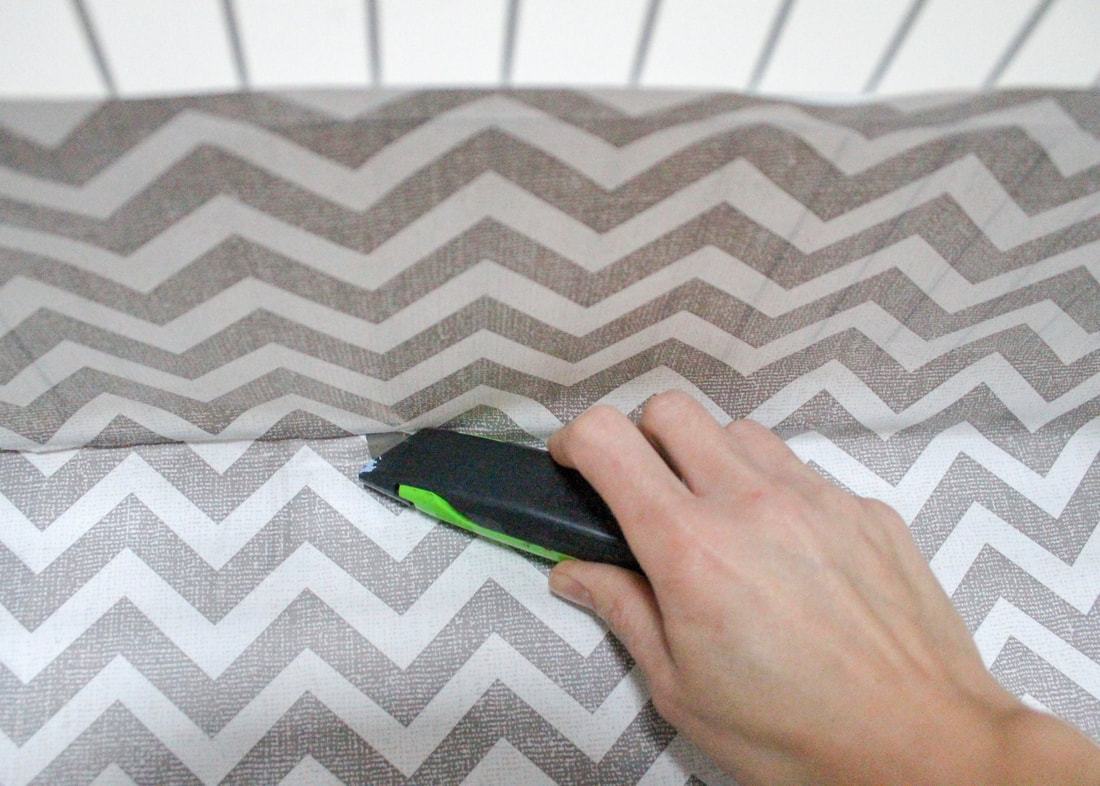
 Tools needed:
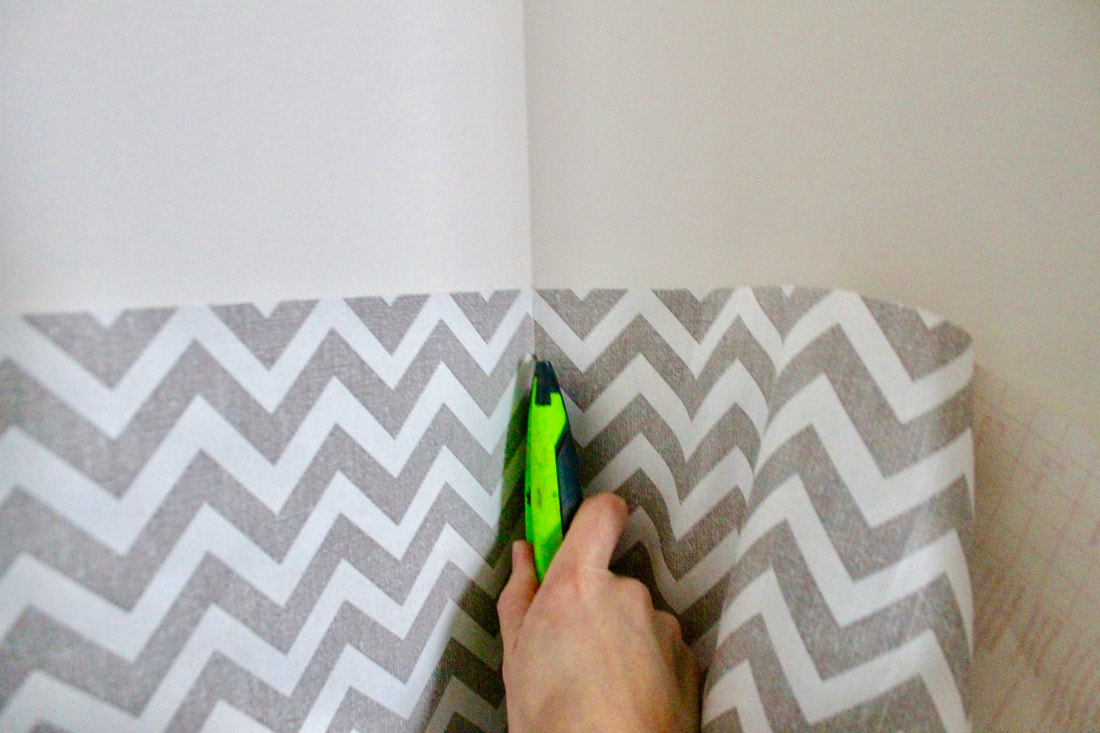
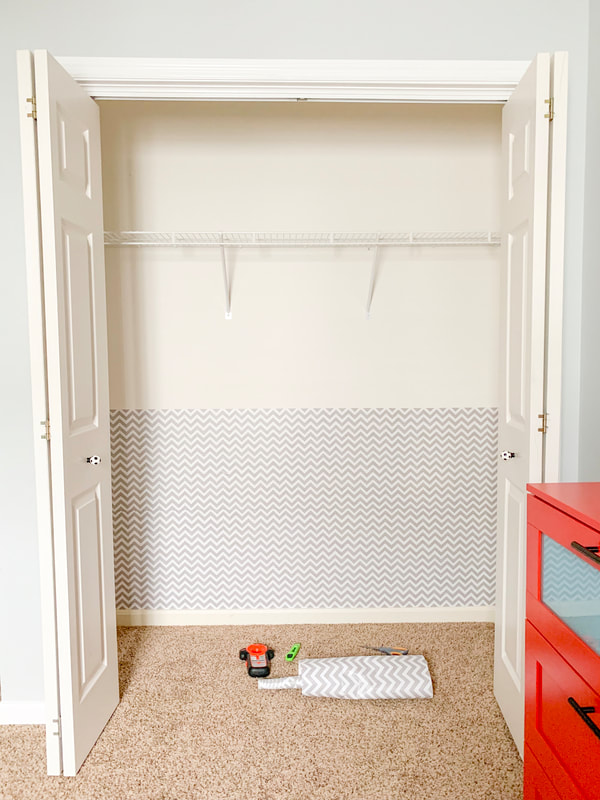
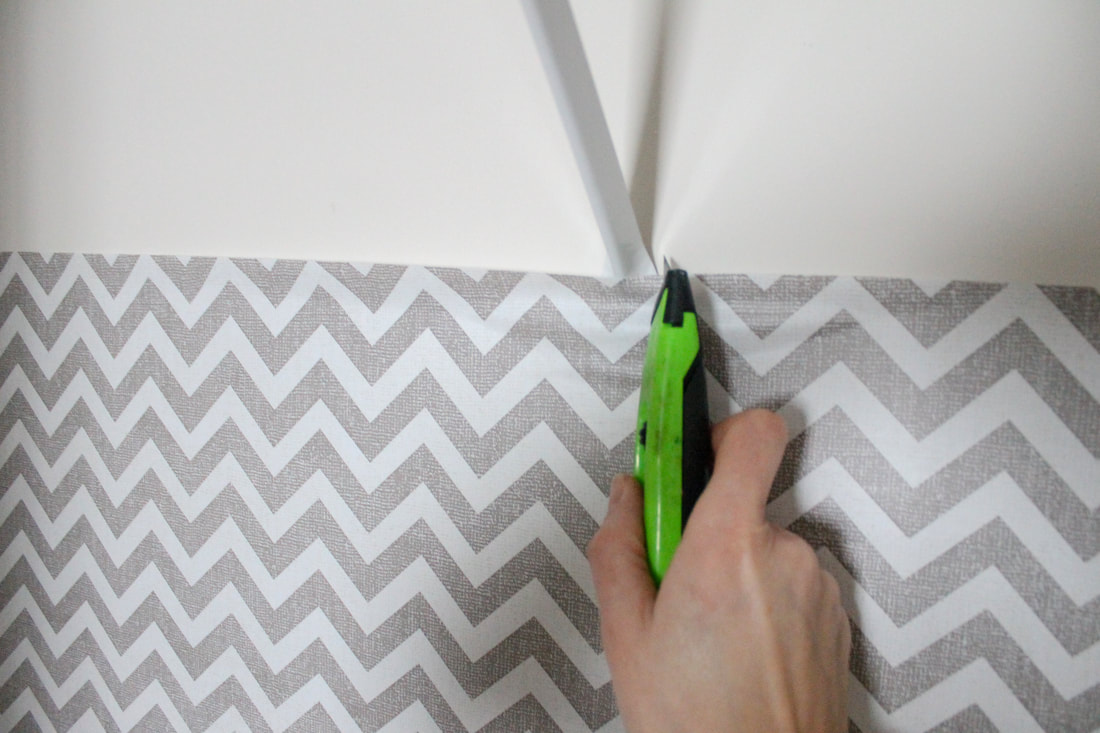
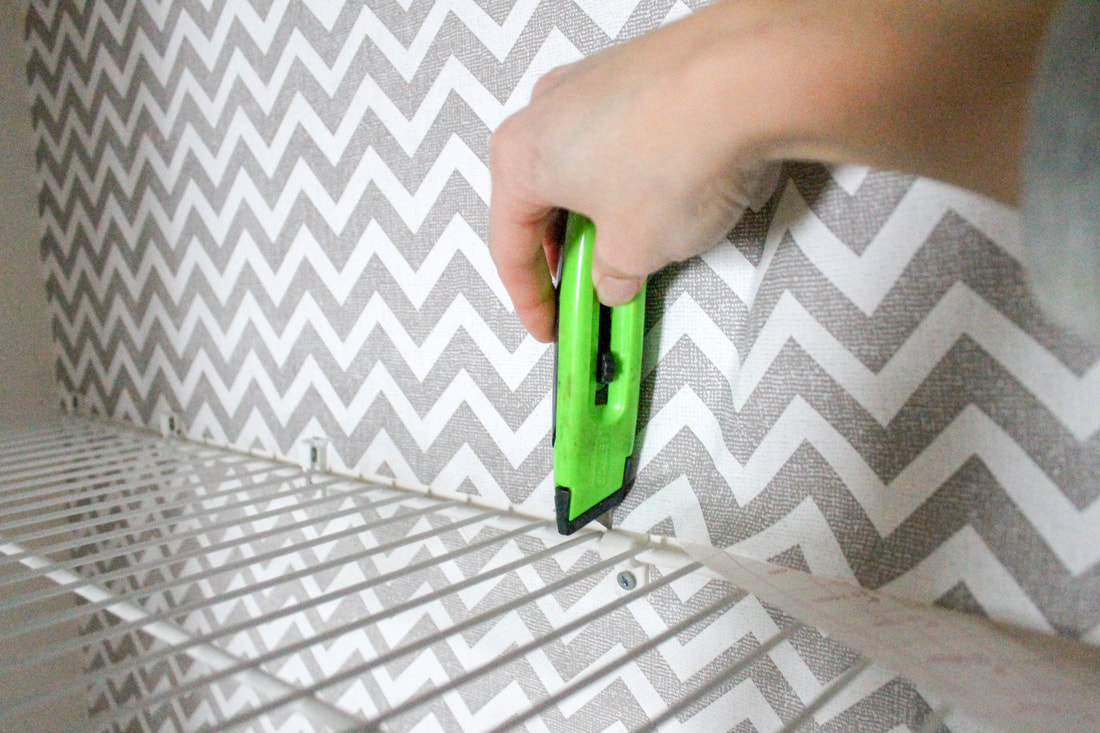
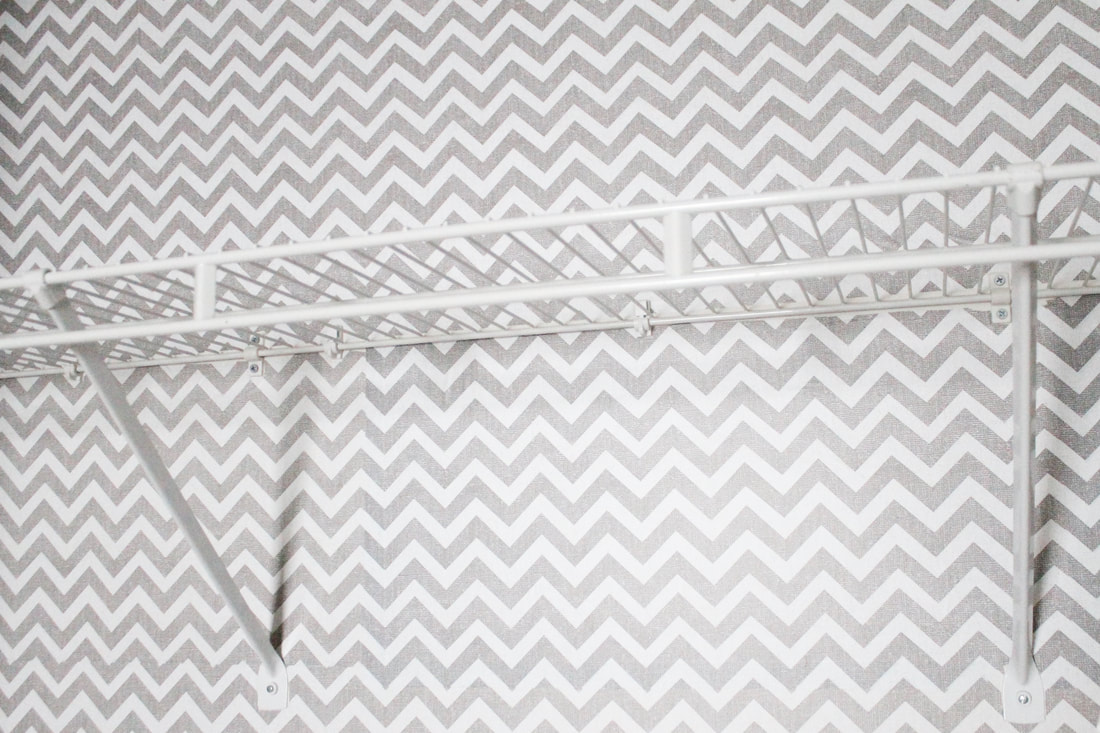
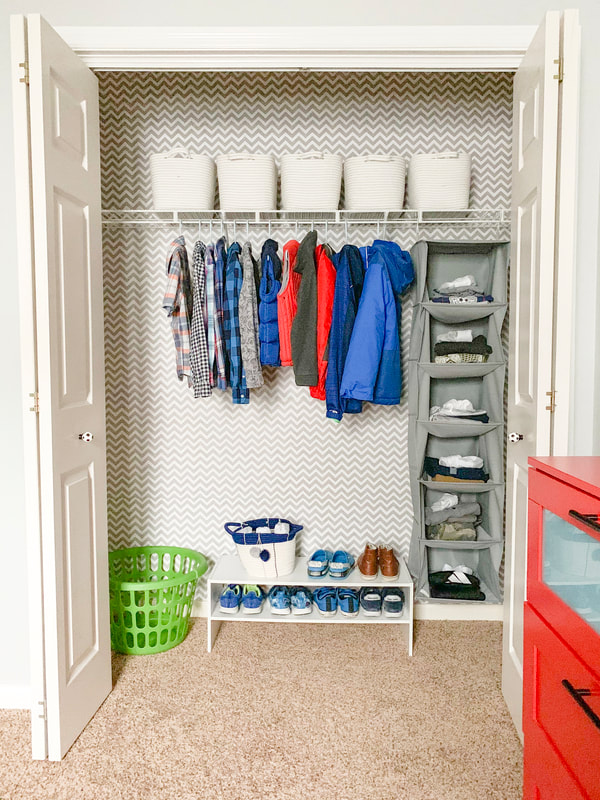
I worked the wall bottom to top, I think it may have worked fine to do it top to bottom also. Knowing this was a closet, my goal was simply better than before, not perfect. 2. Do not assume your walls or trim are straight. Use a laser level to get a straight line. Line the wall with your pencil the width of your paper from trim up. 3. Next peel a few inches of the contact paper off the backing sheet and attach it to the corner of the wall level to your pencil line and leaving an inch or two overhang on the side and bottom edges. This will give you a perfect line and a clean cut. Only unroll the contact paper off the backing a few inches at a time, peeling off and reattaching as needed for wrinkles and bubbles. Work your way horizontally across the wall. 4. When you get to the other side, use your utility knife to cut off the excess paper leaving a straight, clean edge. Use a squeegee, cloth or smoothing tool to remove wrinkles. Puncture any bubbles with a pin and smooth. 5. Take your roll and again peel off an inch or two of the backing, moving up, begin lining your second area of the wall. Contact paper may not have an exact repeat. Meaning the pattern doesn’t repeat itself perfectly. Which is why I probably wouldn’t use this on a wall in my living room, but for closets it works great. The repeat on the contact paper I was using didn’t line up seamlessly. But, it’s hardly noticeable. 6. Continue to repeat the process as you move your way up the wall. Because the closet I was working in already had a wire shelf and rod, I didn’t want to remove it. Working a few inches at a time and unrolling the paper as I went across the wall I stretched the paper over the shelf bracket. Once sealed, I used a utility knife to cut around the bracket and smoothed out the edges. 7. To apply the paper behind the brackets and under the shelf, I cut the paper into three small manageable sections. I used the utility knife to cut around screws and shelf brackets as well as cutting the excess paper below the shelf. 8. On top of the shelf I used the shelf as my guide to unroll the paper in a straight line, again using the utility knife to cut around brackets. 9. Repeat the hanging process as you move up the wall and on each side, removing and reattaching as needed. Making sure to smooth wrinkles and bubbles as best you can. This article is featured on Adore Them. To view the full article click below.
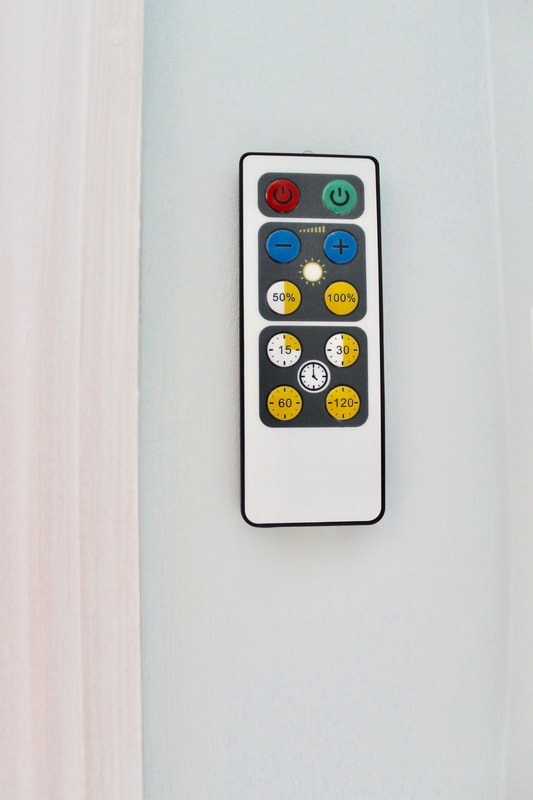
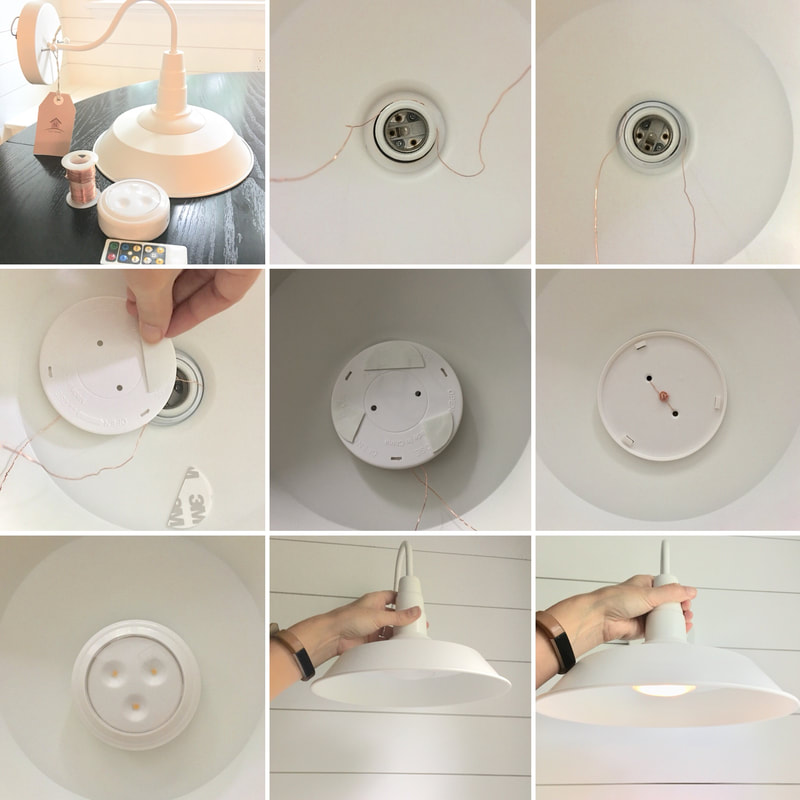 How to install a remote controlled puck light sconce:
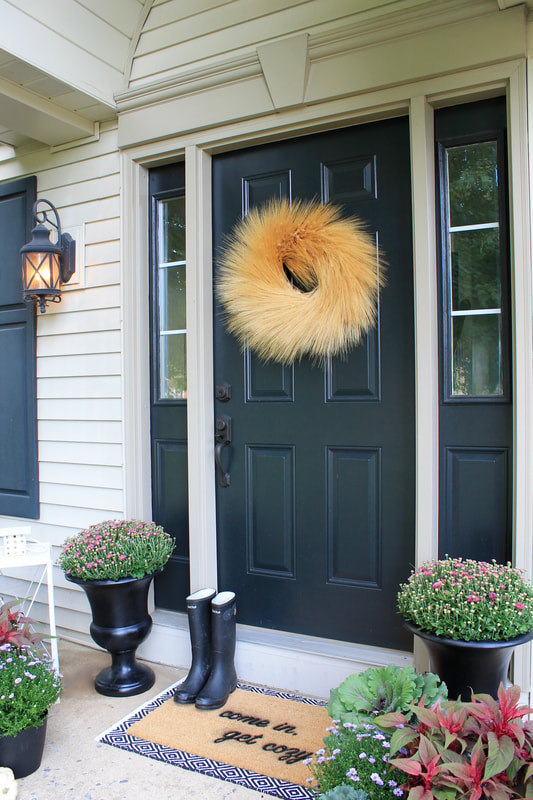
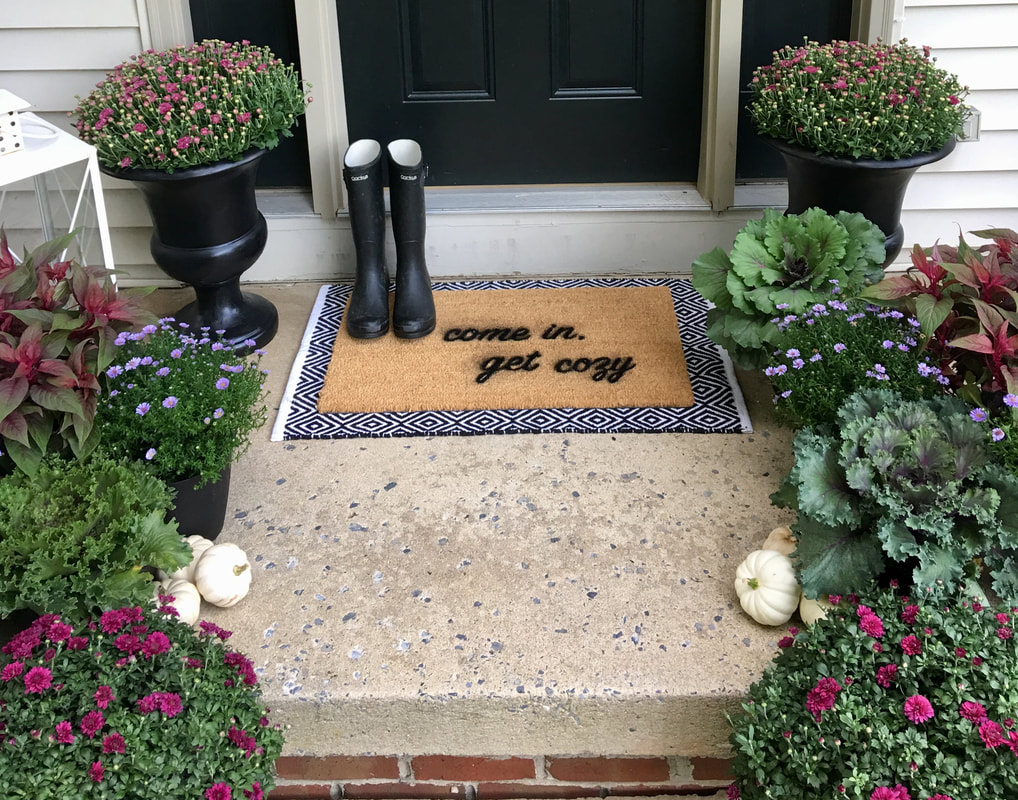 I love the look of a fresh entry. I try to give mine a spruce every few months because I love it, but also because it is inviting for guests. Adding plants, a chair and pillow, lantern or a new doormat welcomes each visitor who enters. However, changing your doormat out each season can be costly. Here is an easy DIY to make your doormat look fun while being affordable. 1. Purchase a plain coir doormat and spray paint in any color. I got my mat at Target for $10 and had left over spray paint from a previous project. 2. Decide on what you want to say. I choose "come in, get cozy" because it's fall and this is when I begin to hermit. #truth 3. I've seen other DIY'ers go a few different paths at this point, mainly buying stencils and hand painting mats. Alternately, I think the least expensive and the easiest is to print your saying on regular card stock. This will become your stencil so plan out the size of your letters. To make it easy, I choose my font then made the text size as large as it could go while fitting on the page, ensuring that each word had it's own piece of card stock. 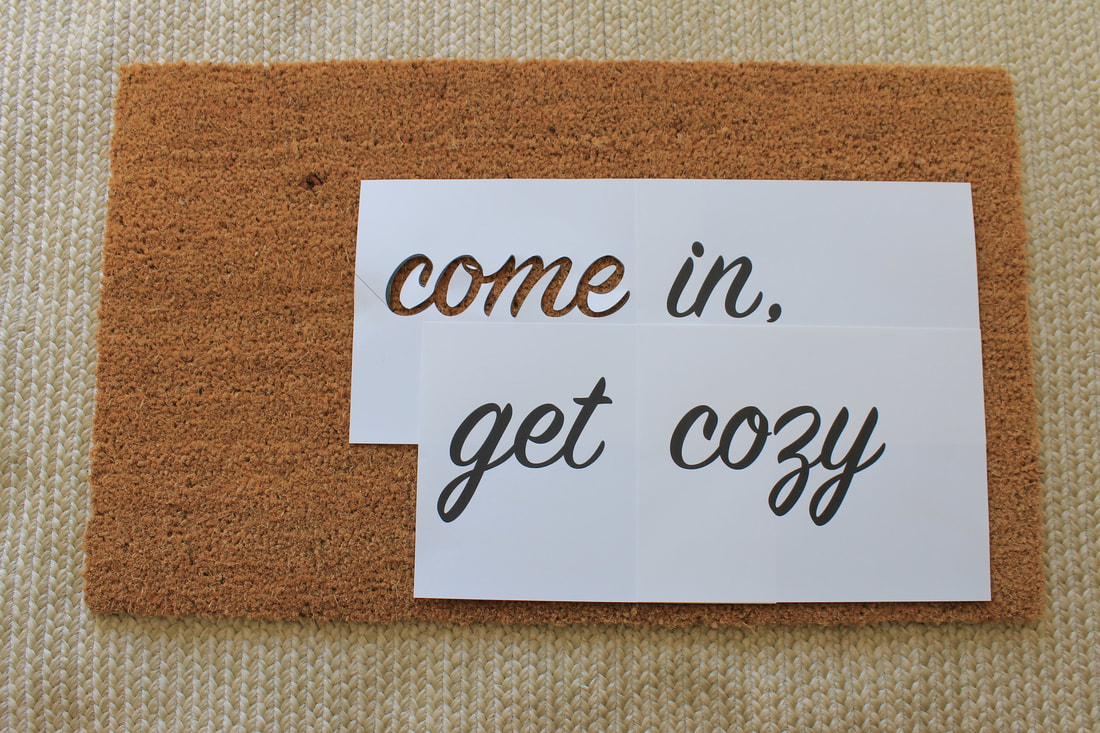 4. Cut out each word being sure to enter and exit at the same point. Also carefully remove the loops inside of letter. Place tape over the entry/exit so that no spray paint will seep through the gap in paper. 5. Position each stencil on the coir mat using painters tape to secure. If the paper gaps, secure it with wrapped painters tape just inside the stenciled the letters. 6. Now lay each of the small pieces that make up the loops of words. You'll need to wrap your painters tape so it's sticky on both sides. 7. Use butcher paper, newspaper or anything large enough on hand that you can wrap around the coir mat and secure with painters tape so there is no overspray. 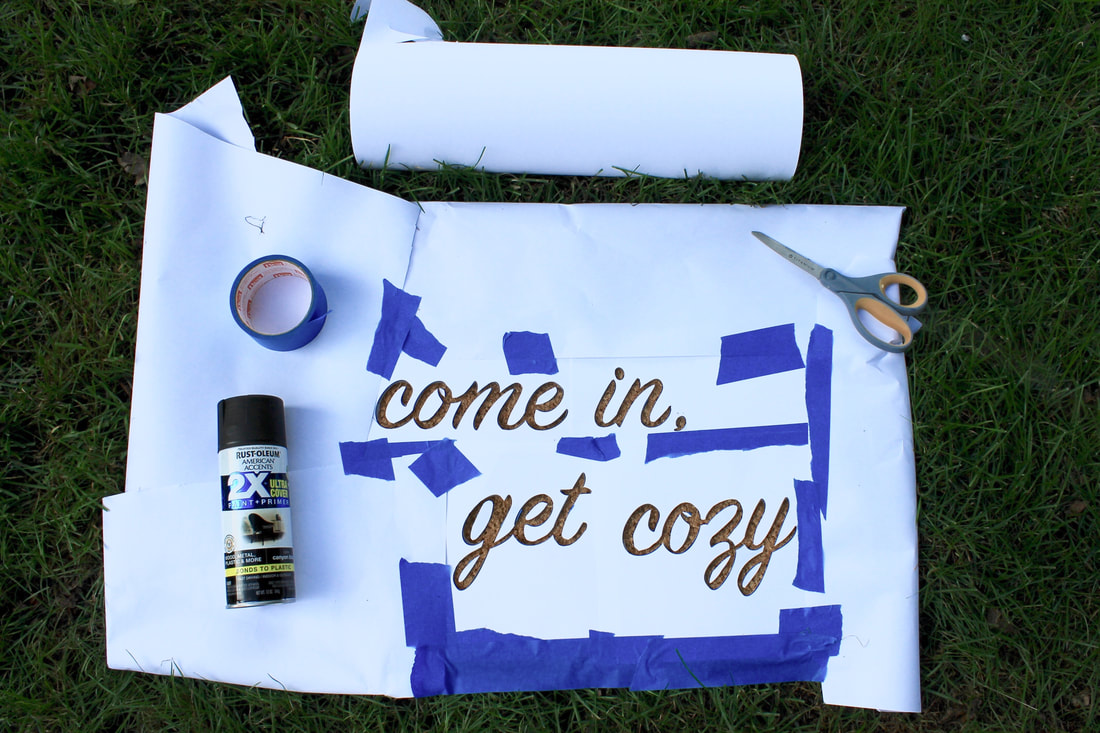 7. Use butcher paper, newspaper or anything large enough on hand that you can wrap around the coir mat and secure with painters tape so there is no overspray. 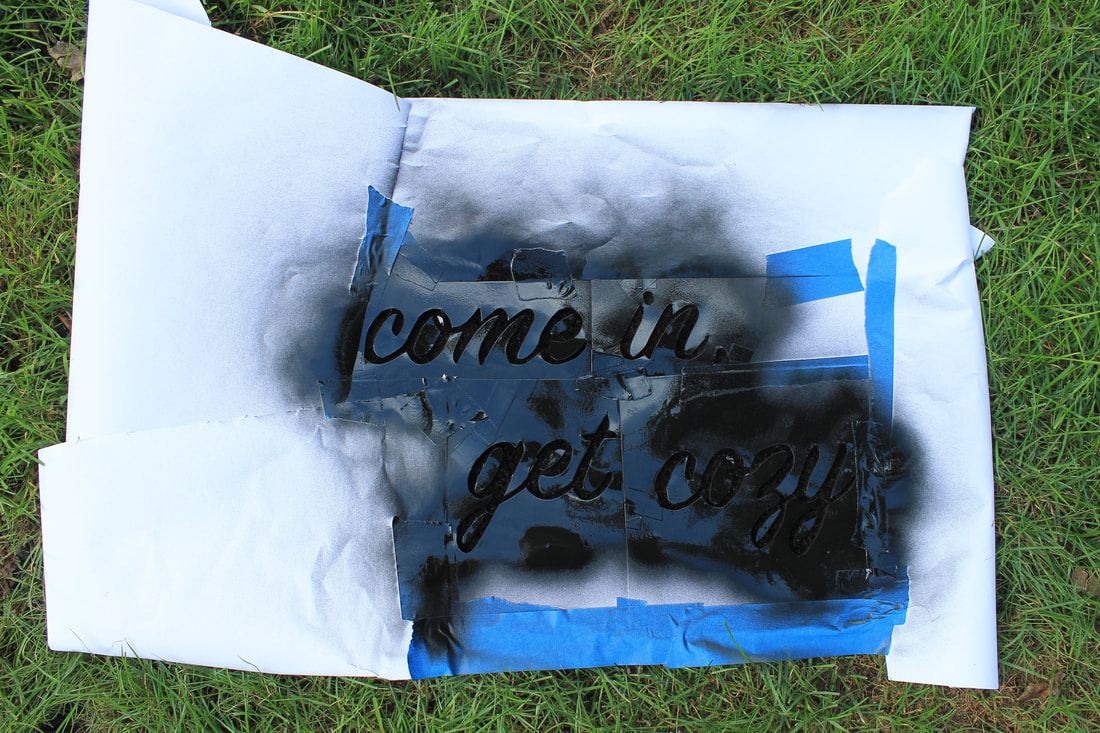 8. Making sure that only the cut out stencil is showing on your mat, spray light even strokes over your words. Once the paint looks even, let set for a few moments. 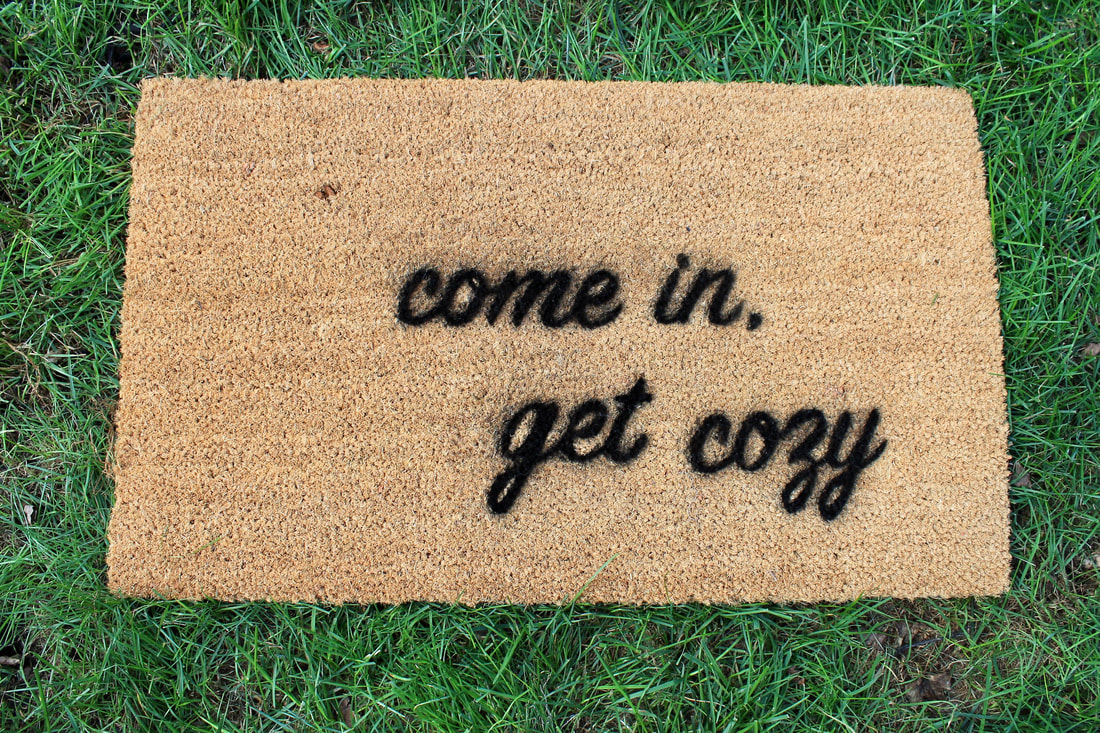 9. Remove all paper and tape from your mat. 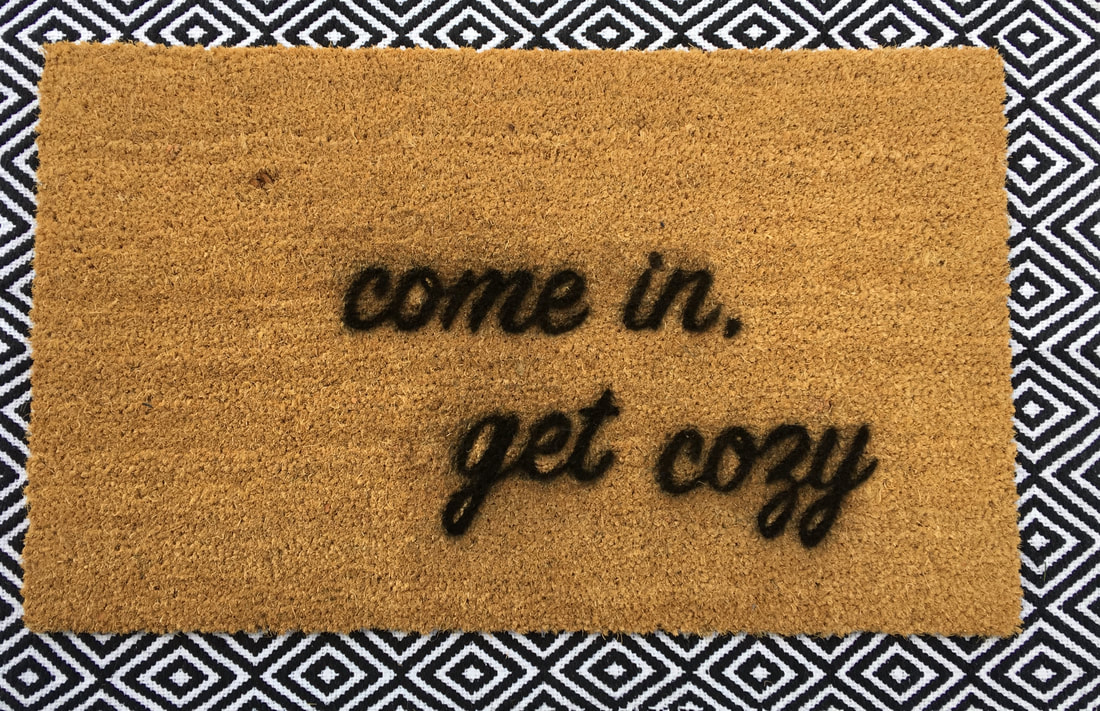 10. Layer your finished coir doormat over another outdoor mat to make it appear larger. I hope this project was helpful and inspires you to make your own doormat! To get you started, I've attached my stencil in pdf. Enjoy!
 |

Pamela Rineer |
||||